
Making necklaces with beads is a fun and relaxing craft. You do not need many tools. You only need the right beads, a string, and a little patience. This guide will walk you through the steps in a clear and simple way. You can follow it even if you are new to jewelry making.
Why Beaded Necklaces Are Popular
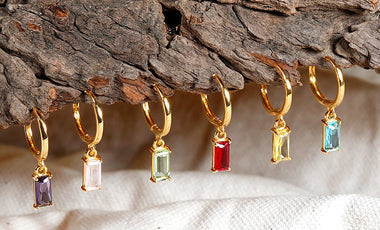
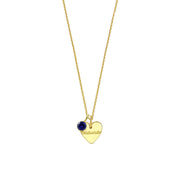
Beaded necklaces are loved by many people. They look colorful and add a personal touch to any outfit. You can choose any bead shape, size, or color. Every necklace turns into a small piece of art. It also makes a great handmade gift.
What You Need Before You Start
Basic Tools
Gather your tools first. You need:
-
Beads of your choice
-
Beading wire or thread
-
Wire cutters
-
Crimp beads
-
A clasp
-
Flat-nose pliers
These items are easy to find in craft stores or online.
Learn More: How to Make Resin Jewelry
Choosing the Right Beads
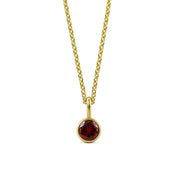
Beads come in many types. Glass beads shine. Wooden beads give a natural look. Seed beads are tiny and perfect for detailed styles. Pick colors you like. Think about how long you want the necklace to be.
Picking the String or Wire
Your string matters. Nylon thread is soft and flexible. Beading wire is stronger and lasts longer. Stretch cord works well for casual necklaces. Match the string size with the bead hole.
Steps to Make Necklaces with Beads

Step 1: Plan Your Design
Lay the beads on a flat surface. Try different color patterns. Mix shapes and sizes. This helps you see how the necklace will look before you start stringing. Keep your design simple if you are new to this.
Step 2: Cut the String
Cut a piece of wire or thread a bit longer than your planned necklace length. Add extra length for attaching the clasp.
Step 3: Attach One Side of the Clasp
Slide a crimp bead onto the wire. Add the clasp. Loop the wire back through the crimp bead. Pull it tight. Press the crimp bead flat with pliers. This locks the clasp in place.
Step 4: Start Adding Beads
Now string your beads. Take your time. Follow the design you laid out earlier. If you make a mistake, you can pull a few beads off and fix it.
Step 5: Seal the End
When you finish adding beads, slide another crimp bead on the wire. Add the other side of the clasp. Loop the wire back through the crimp bead and a few beads nearby. Pull the wire tight so the beads sit close together. Press the crimp bead with pliers to secure it. Cut off extra wire.
Step 6: Check Your Necklace
Hold the necklace and shake it gently. Make sure nothing feels loose. Check the clasp. Wear it and see if it sits well. Your beaded necklace is ready.
Tips for Better Beaded Necklaces

Mix Bead Styles
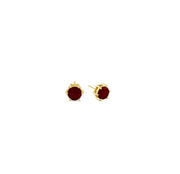
Try mixing stone beads, seed beads, and accent beads. This gives your necklace more character.
Use a Bead Board
A bead board helps you plan long necklaces. It shows measurements and helps you keep the pattern in place.
Try Color Themes
Pick colors that match your outfit or season. Warm colors look nice in summer. Cool colors feel fresh in winter.
Practice Makes You Better
The more necklaces you make, the cleaner your work becomes. You start learning what works and what does not.
You May Also Like: Is Pandora Jewelry Real? Let’s Find Out
Common Mistakes to Avoid
Cutting the String Too Short
Always cut extra length. This helps when you loop the wire through crimp beads.
Using Weak Thread
Thin thread can snap. Choose strong thread or beading wire for heavy beads.
Skipping Crimp Beads
Crimp beads keep the necklace safe. Never skip them. They hold your clasp in place.
Conclusion
Making necklaces with beads is simple, fun, and creative. With just a few tools and some practice, anyone can craft unique jewelry. Planning your design, using the right string, and securing your beads with crimp beads ensures a durable necklace. Experiment with colors, shapes, and patterns to create pieces that reflect your style. Whether for yourself or as a gift, handmade beaded necklaces are a rewarding and enjoyable craft. Start small, follow the steps, and watch your collection grow.